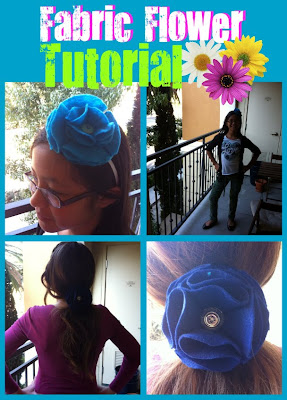
Meet my super cool little sister Athena! This weekend Athena and I had a fun day full of crafting! Athena was super excited when she heard about the blog and wanted to be apart of it. So after getting her mom's permission, we decided to document our crafting adventure.
 Some of you may be asking, "how can you two be sisters if you look nothing alike?", well that is because Athena and I are apart of the Big Brothers Big Sisters (BBBS) program. We have been matched together for about a year and a half. Athena and I get together a couple times a month and we have a blast! If you are interested in learning about being apart of this awesome program, check out their website. (most of us Hobbyoholics gals are involved and we LOVE it!)
Now, if you are half the Pinterest fan that I am, then you have seen MANY tutorials on making fabric flowers. This is how I learned to make these flowers in the first place. Here are a couple of my favorite tutorials:
Felt Flower Headband Tutorial
T-shirt Fabric Flower Tutorial
Flower pins
This may be a repeat for some of you, but hopefully I am introducing you to a couple new techniques :)
Supplies:
- Felt (Michaels has a variety of colors for only $0.27!)
- Cute buttons
- Neddle
- Thread
- Optional - elastic, pen, pony tail, etc.
- Start tracing circles. You will need at least 5 circles of the same size, but you can make a thicker flower by cutting 7 or 9 circles.
- Cut your circles. Try to make them all the same size.
- Fold your circle. First, fold your circle "hotdog" style (or Athena called it "taco")
- Keep folding. Now fold the same circle "hamburger" style (Athena called it "pizza", pretty smart girl!)
- Clip it. To make things easier, I like to clip all the "petals" with a clothespin (in my opinion, clothespins make most projects easier!)
- Repeat. Repeat steps 3-5 for the rest of the circles, but keep one for your base.
- Prep for sewing. Again, to make things easier, I like to clip my petals to the base with clothespins. When all the petals are clipped to the base it should look a little like a personal pan pizza (sorry for all the food references, I must be hungry!)
- Sew. Sew the acute end of your petals to the base piece of felt.
- Add more petals. If you so chose, clip some additional petals and sew. In my experience, I typically only need 4 petals for smaller flowers, 6 petals for medium flowers and 8 petals for larger flowers.
- Sew some more.
- Add a button. These flowers are pretty stinking cute on their own, but for some extra pizazz add a button.
- Enjoy your beautiful flowers! Add these flowers to a headband, ponytail or a pen and enjoy!
Thanks everyone! More blogging to come!


No comments:
Post a Comment